How to use CADY
Two files. Five minutes.
To run CADY, all you need is a Netlist and a BOM. Below: how to export both from every major ECAD environment.
Step 1
Export your Netlist
CADY supports the leading ECAD vendors. Find your tool below and follow the export steps.
Siemens — Xpedition / DxDesigner / PADS Pro
-
Open the menu:
File → Export → Quick Connection View.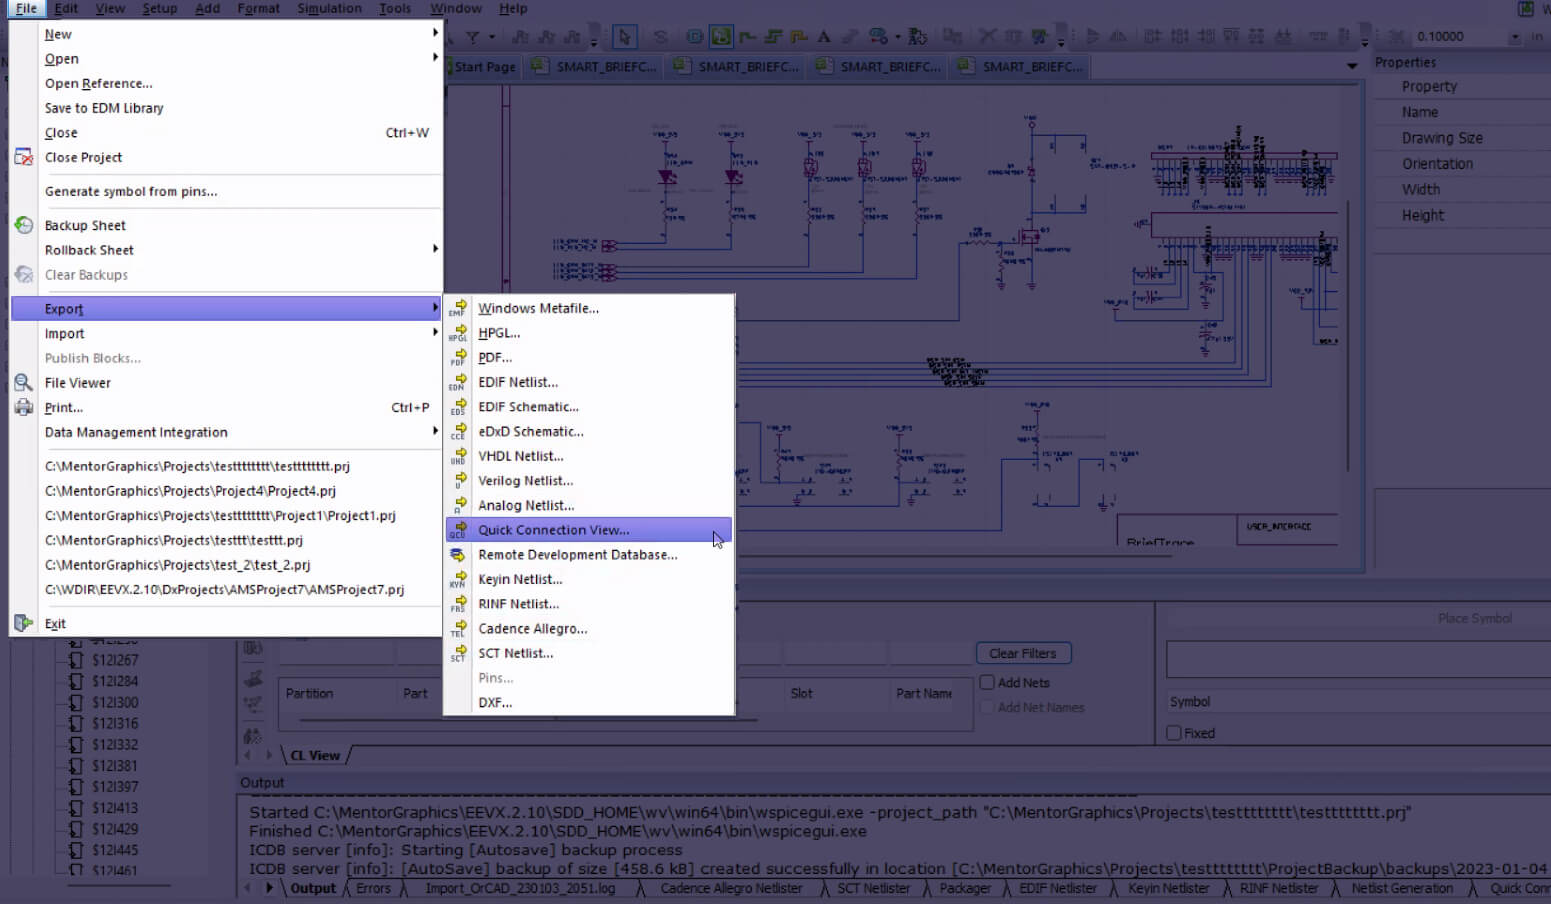
-
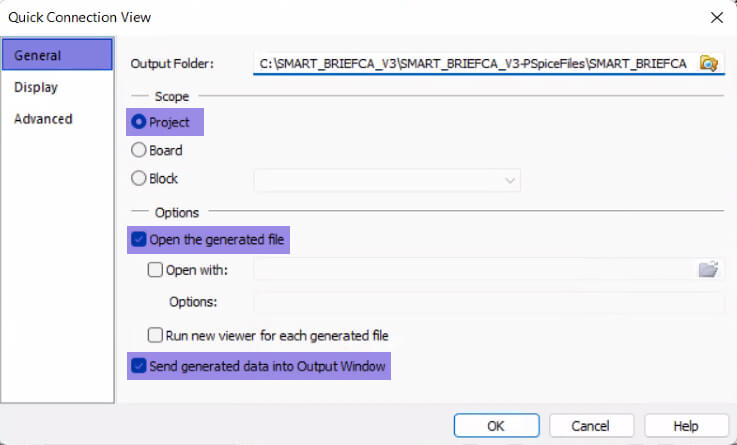
Press OK to export the netlist. For new
projects, configure the settings first (see below).
-
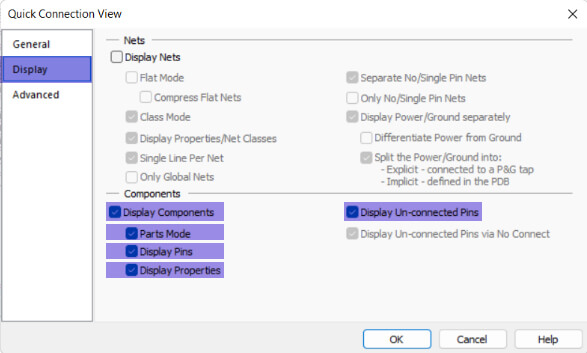
On the Display tab, select the recommended
options for your project.
-
On the Advanced tab, set
Filter to None and enable the
designated checkboxes.

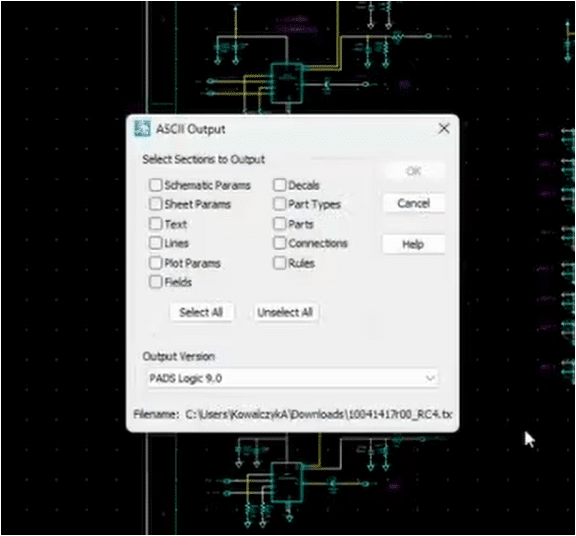
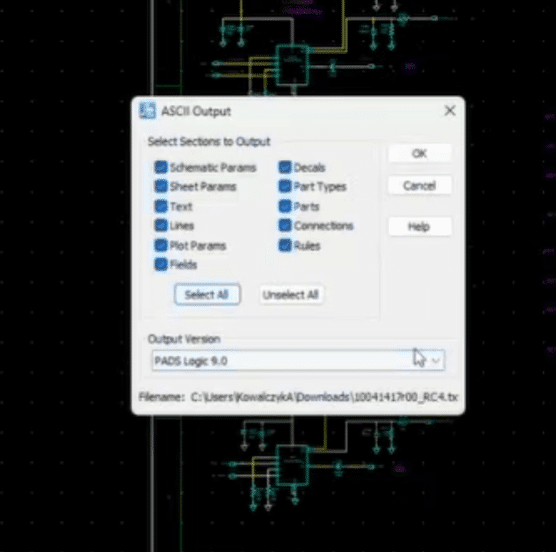
Siemens — PADS Logic
-
Open the menu:
File → Export.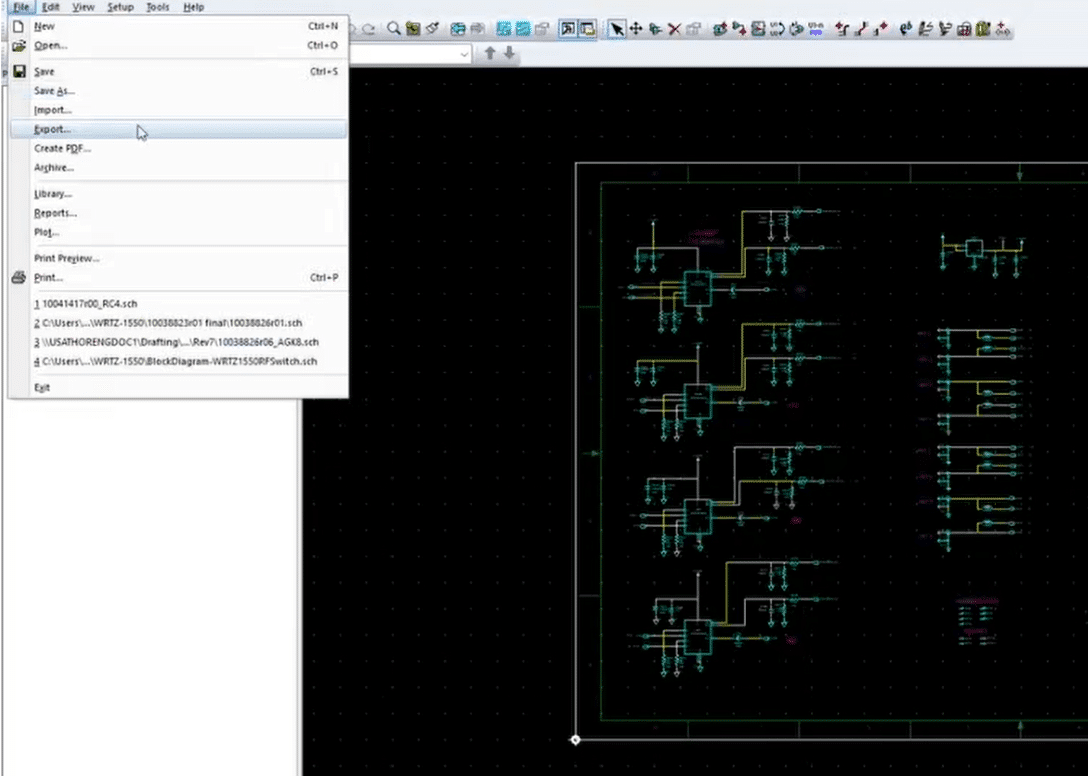
-
Click Select All.
-
Click OK.
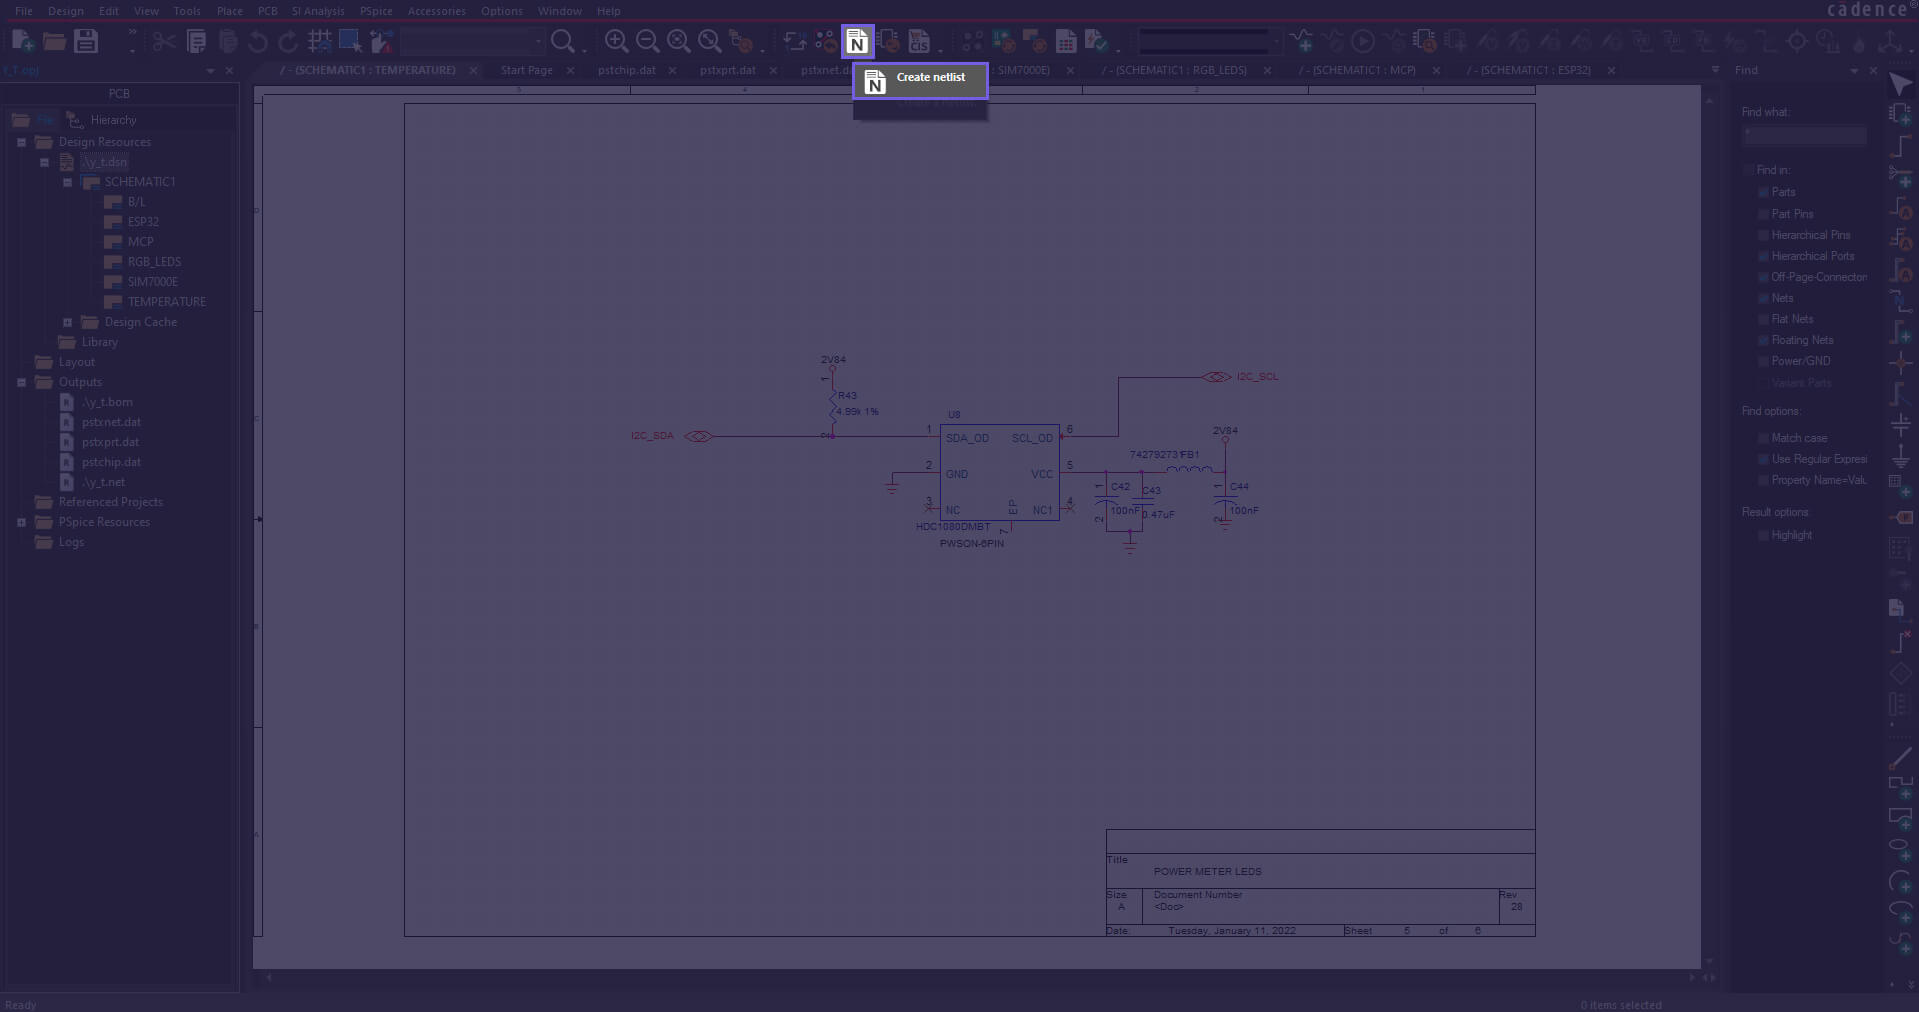
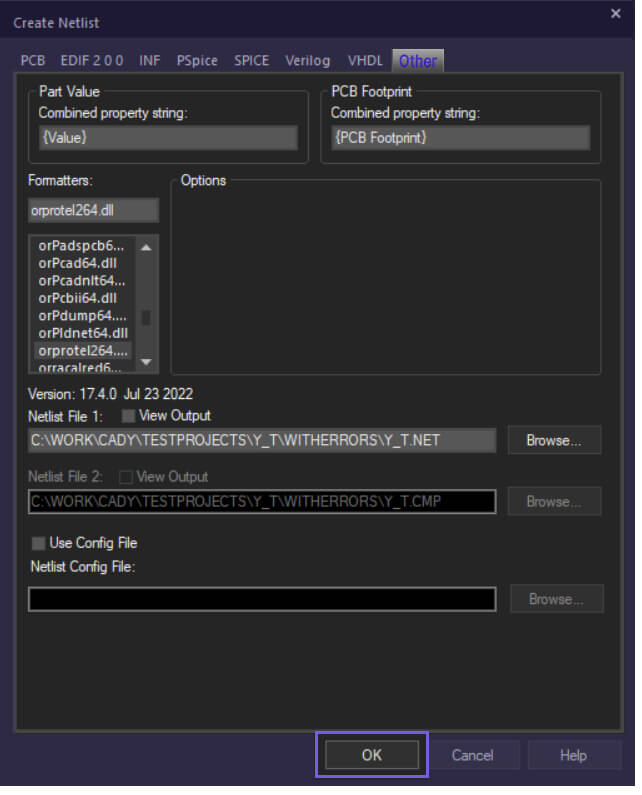
Cadence — OrCAD / HDL / Concept
-
Click Create Netlist at the top of the toolbar.
-
Press OK on the dialog that appears.

-
If you hit issues, verify your settings under the
Other tab.
Altium
- Open a
.SchDocfile. -
Navigate to
Design → Netlist For Project → Protel2.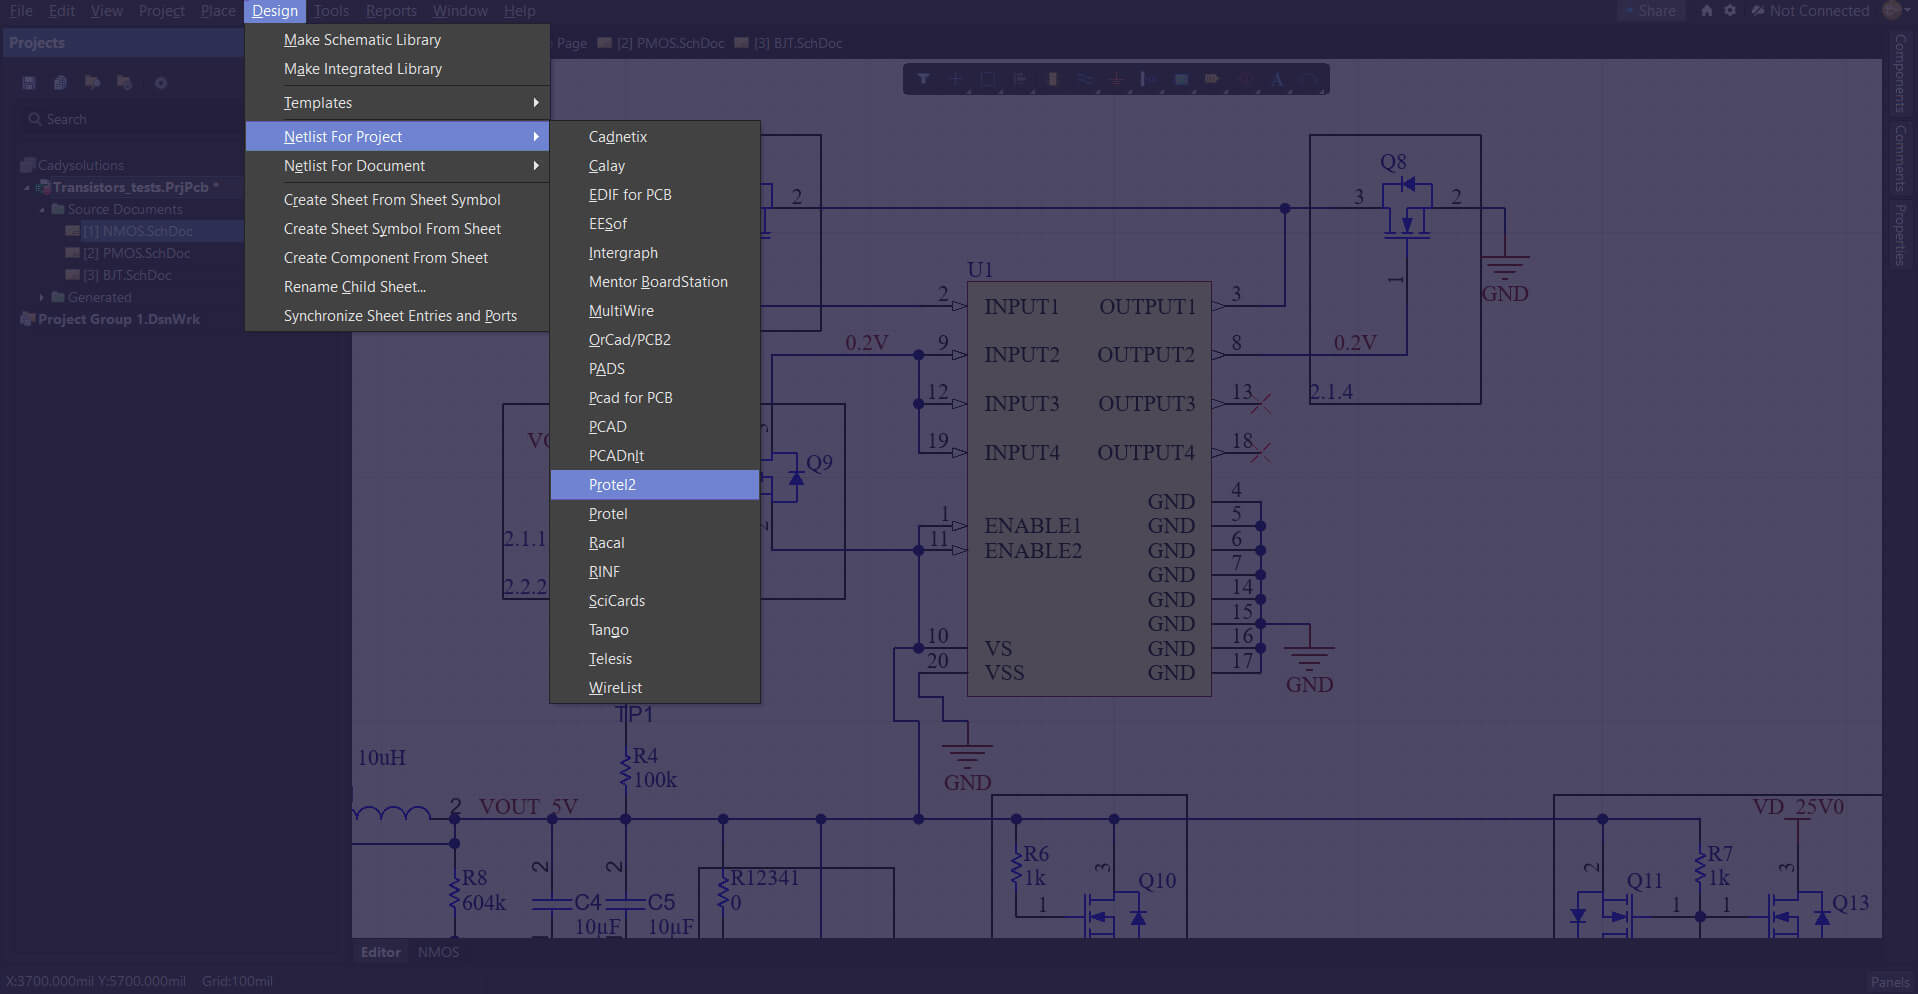
- The exported file will appear under Projects Output For <project name>.
KiCad
-
Open the menu:
File → Export → Netlist.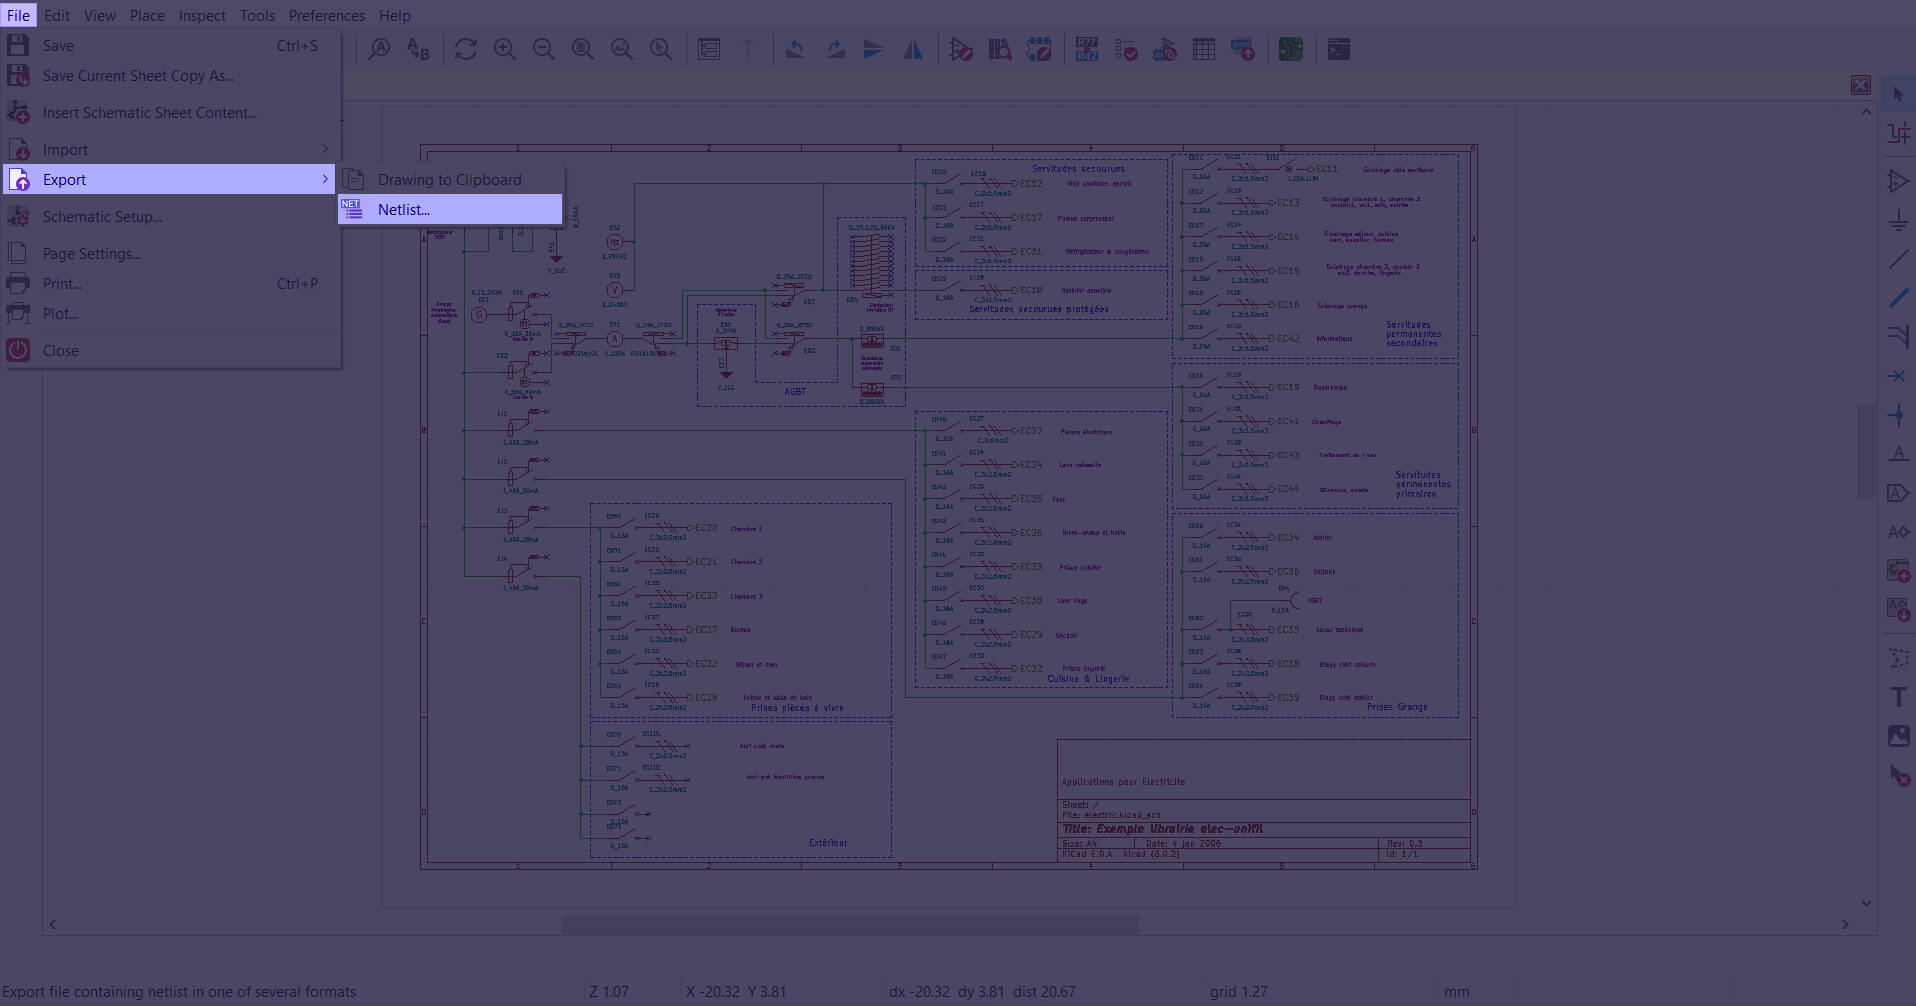
-
On the KiCad tab, click Export Netlist.

Eagle
-
Open
File → Export → Netlist.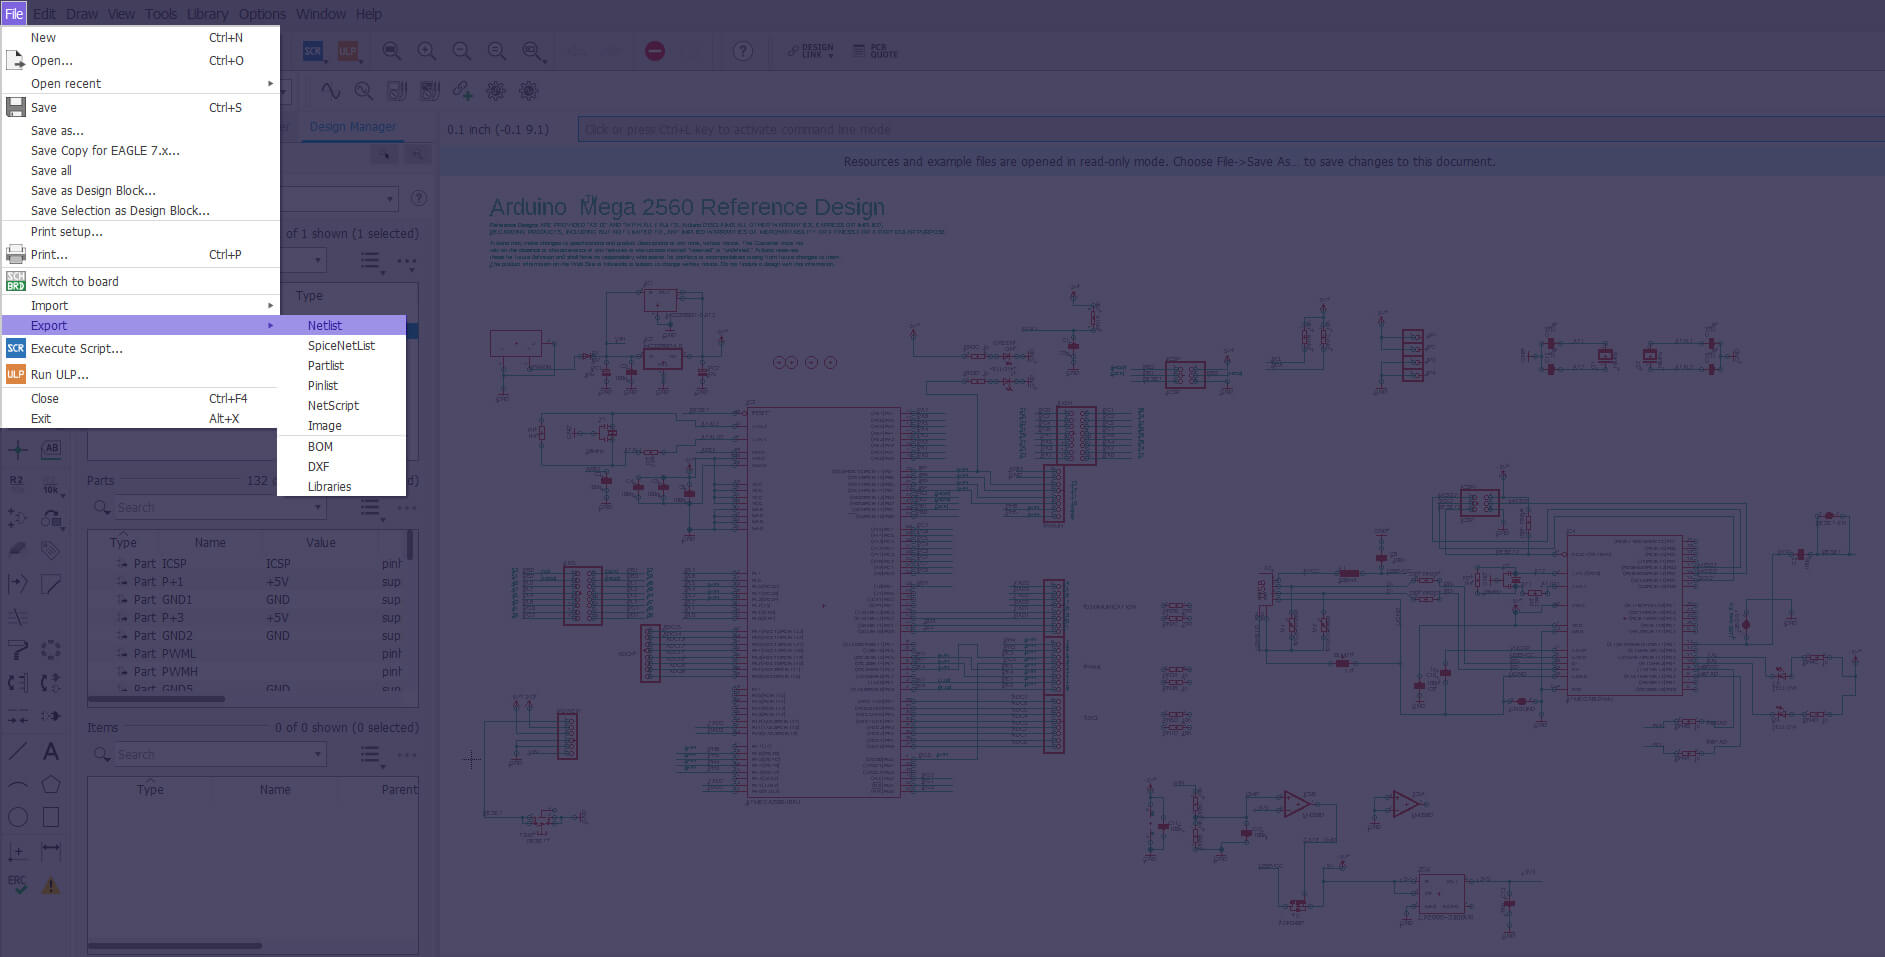
-
Then open
File → Export → Partlist.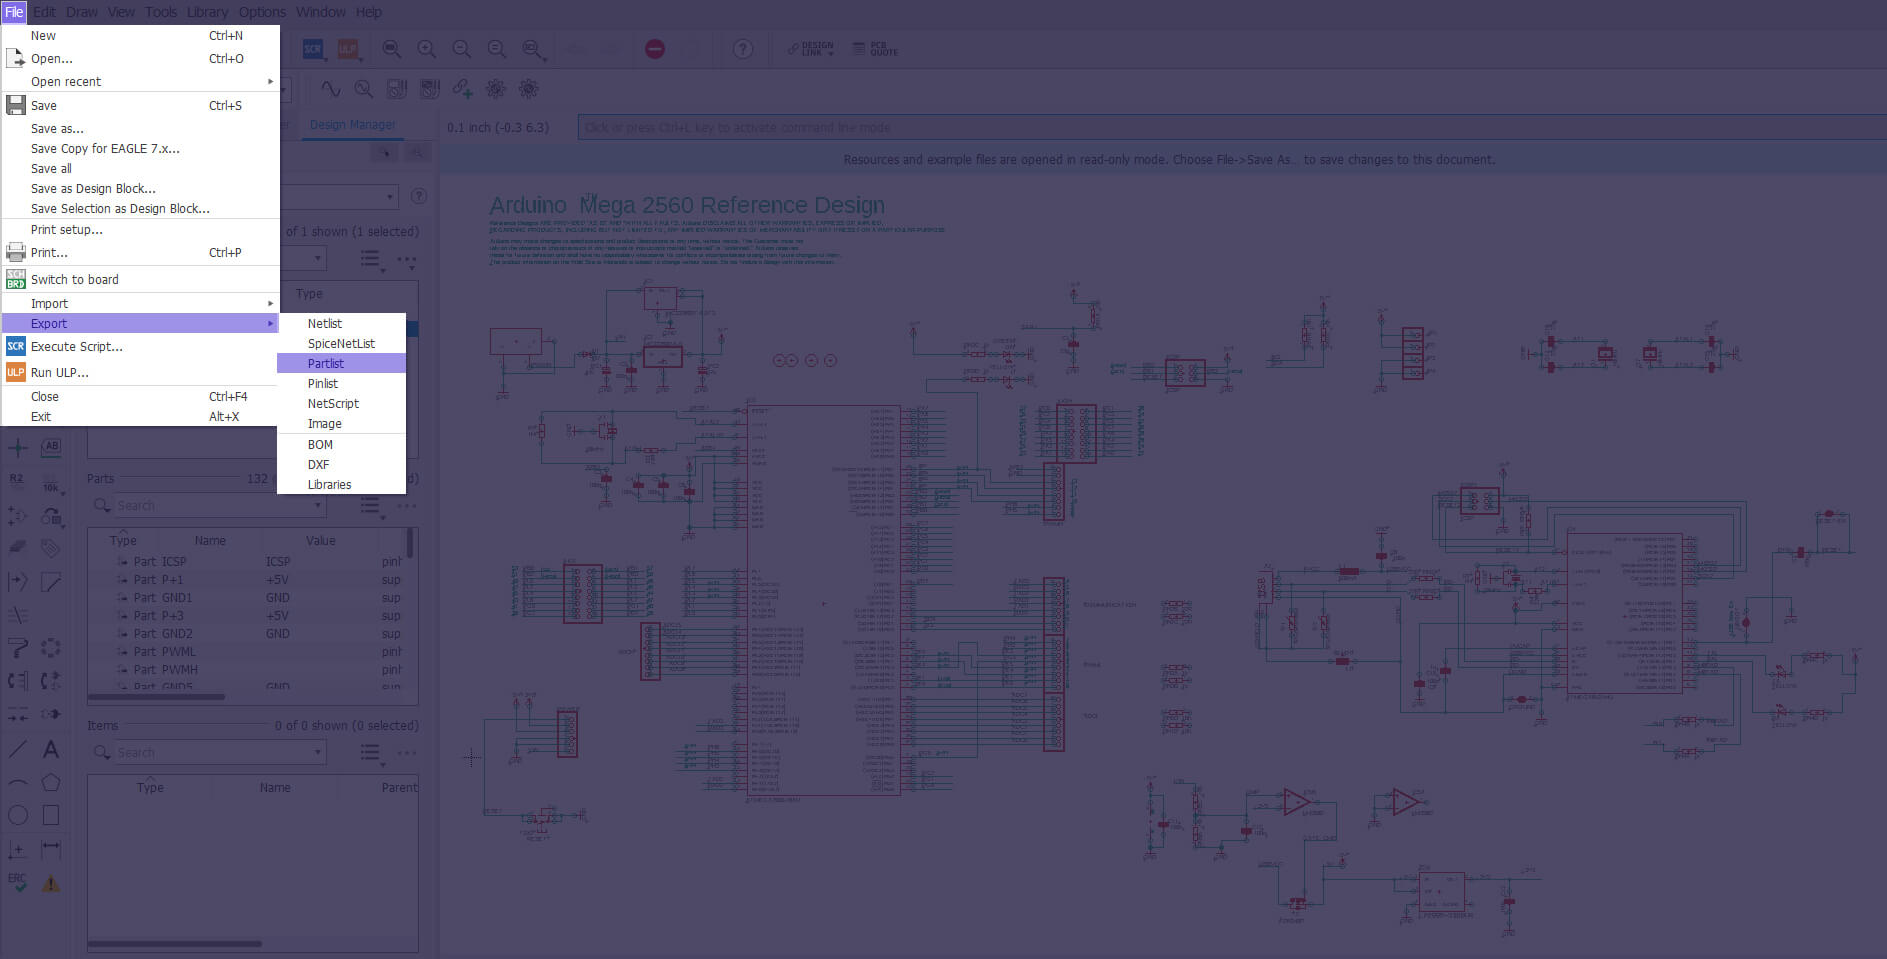
Note: the Netlist file must have
netlist in its filename, and the Partlist file must
have partlist in its filename.
Zuken
-
Navigate to
Tool → Forward Annotation → Design Force.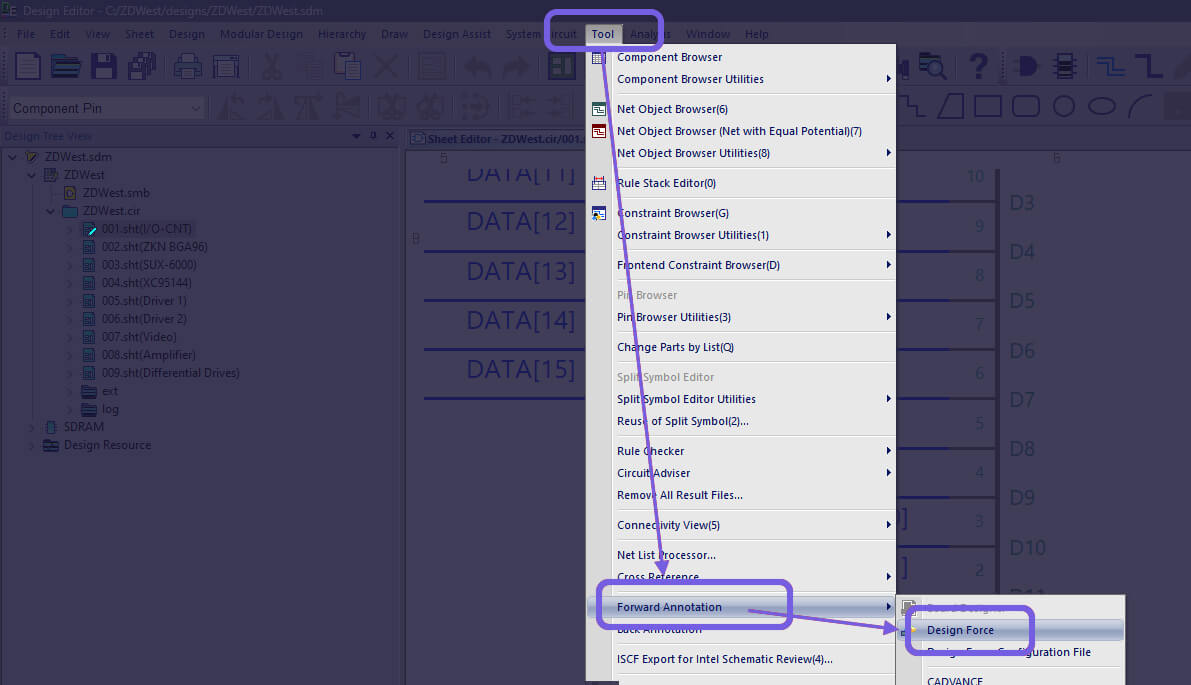
- Export the
.NDFnetlist file.
Step 2
Prepare your BOM
Any .csv, .xlsx, or .xls file works,
as long as it contains at least one manufacturer part number for each part
reference. No specific column ordering required — CADY adapts to your
conventions after a quick onboarding step.
Need a starting point?
Grab our example BOM and use it as a template for your own designs.
Download example BOMReady when you are.
Got your Netlist and BOM? Upload them and CADY does the rest.